Creating a Plasma Mobile App 1 - Basic Controls
My last post shows how to create a stub Python/Kirigami app that doesn’t do anything. Time to change that! In this post we’re filling the screen with some controls.
Kirigami Pages
Kirigami apps are typically organized in Pages. Those are the different ‘Screens’ of an app. If you come from the Android world you can think of them as the view part of activities. In our case we want to have an initial page that offers to enter a stop or a destination and opens a new page that shows a list of possible routes. Clicking on one of the list items opens a new page with a detailed view about the connections.
Pages are organized in a pagestack where pages can be pushed and popped. On a phone only the topmost page is shown, whereas on a larger screen (desktop or tablet) multiple pages can be shown next to each other.

A single page on the phone

Two pages next to each other on the desktop
So let’s create some pages! I’m going put each page in its own .qml file and let the name end with Page. Our first version of StartPage.qml looks like this:
import QtQuick 2.2
import QtQuick.Layouts 1.1
import QtQuick.Controls 2.4
import org.kde.kirigami 2.0 as Kirigami

Kirigami.Page
{
    title: "Start journey"
}
It produces an empty page with a title. Before we can actually see it we need to add it to the pageStack. Replace the Label {} declaration in main.qml with
pageStack.initialPage: Qt.resolvedUrl("StartPage.qml")
pageStack.initialPage is, well, setting the initial Page of the Page stack. Qt.resolveUrl is converting the relative URL of the QML file into an absolute one. Starting the app gives us an empty page

Time to fill it with some content.
Basic controls
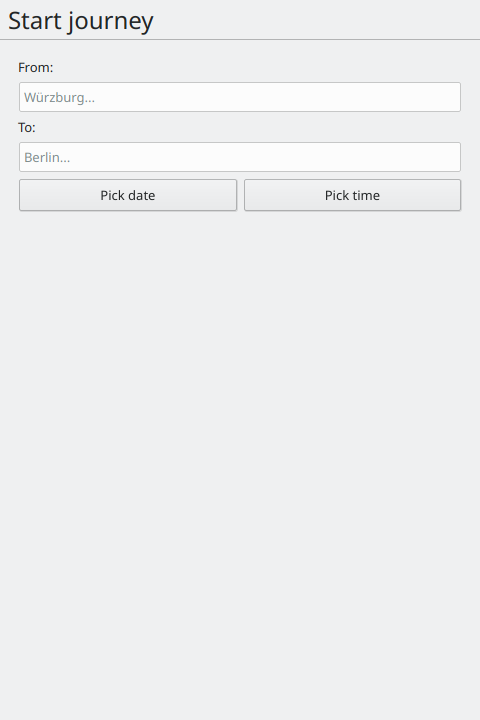
On the start page we need need a way to enter start and destination of our journey as well as the date and time of our travel. For start and destination we are using simple TextFields from QtQuick Controls 2. Note that the older version 1 of QtQuick Controls is still around for the foreseable future, but we want to avoid using that. We’re extending StartPage.qml with our controls
ColumnLayout {
    width: parent.width

    Label {
        text: "From:"
    }
    TextField {
        Layout.fillWidth: true
        placeholderText: "Würzburg..."
    }
    Label {
        text: "To:"
    }
    TextField {
        Layout.fillWidth: true
        placeholderText: "Berlin..."
    }
}
A ColumnLayout is a component that positions its children vertically. We set it to be as wide as its parent, the page. The TextFields shall span the whole width as well. Instead of using the same ‘width: parent.width’ we are using ‘Layout.fillWidth: true’. This property is only available to children of a Layout. The difference to the first way is that all the width that is not already occupied by other elements in the layout is filled.
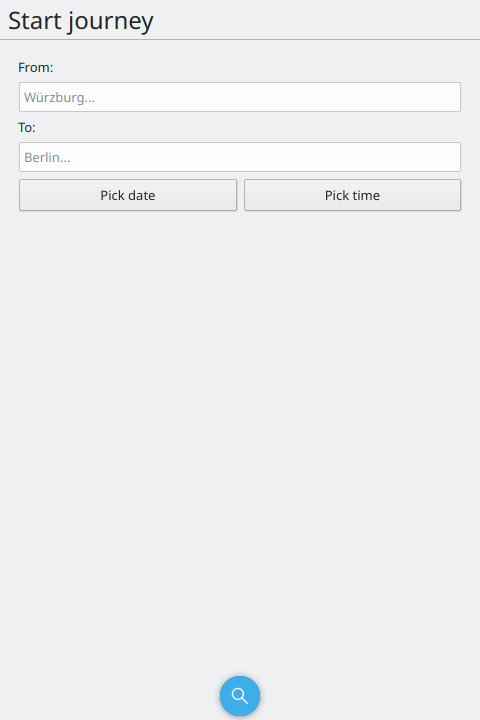
Next we need some way to enter a departure date and time. Unfortunately I’m not aware of any ready-to-use date and time pickers in QtQuick and Kirigami, so I’ll leave this open for a future post. For the time being two simple placeholder buttons shall be enough. Let’s add them to our ColumnLayout
RowLayout {
    width: parent.width
    Button {
        text: "Pick date"
        Layout.fillWidth: true
    }
    Button {
        text: "Pick time"
        Layout.fillWidth: true
    }
}
Now our app looks like this. Both buttons have the “Layout.fillWidth” property set to true, resulting in each one getting 50% of the space.

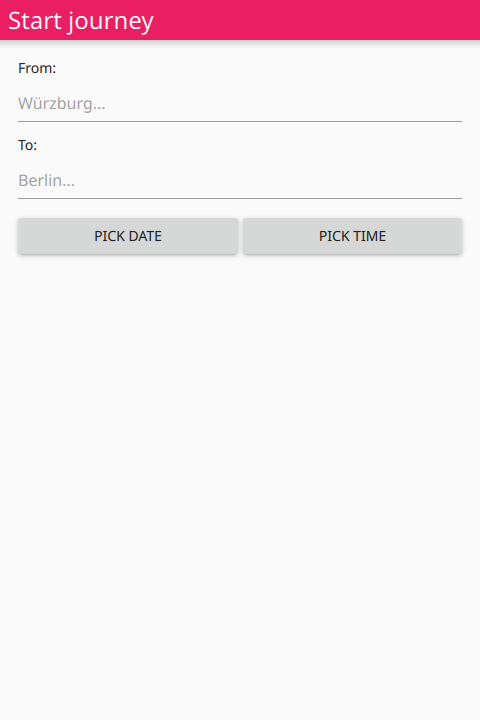
The buttons look a bit weird, don’t they? That’s because they are using the built-in QtQuick Controls style. If you are using Plasma you are probably used to the org.kde.desktop style which emulates the active Qt Widgets style. We can force our app to use the org.kde.desktop style by running ‘QT_QUICK_CONTROLS_STYLE=“org.kde.desktop” ./main.py’
Looks closer to what we have on the desktop, doesn’t it? Qt also offers a ‘material’ style that follows Android’s material guidelines
Next we need a way to press “Search”. We could solve that with yet another button, but Kirigami offers another way. Pages in Kirigami can have Actions associated with them. The presentation differes from the phone to the desktop. On the phone actions are displayed on the bottom where they are easily reachable while on the desktop they are displayed in form of a toolbar at the top of the page. Let’s add an action to our page
Kirigami.Page
{
    id: root

    title: "Start journey"

    actions.main: Kirigami.Action {
        icon.name: "search"
        text: "Search"
        onTriggered: pageStack.push(Qt.resolvedUrl("ConnectionsPage.qml"))
    }

    ColumnLayout {
On the phone we get this
while on the desktop we get that

You can force the mobile view on the desktop by setting the QT_QUICK_CONTROLS_MOBILE variable to 1.
Triggering the action pushes ConnectionsPage.qml on the pageStack. Of cource we need to create that one now:
import QtQuick 2.2
import QtQuick.Layouts 1.1
import QtQuick.Controls 2.4
import org.kde.kirigami 2.4 as Kirigami

Kirigami.Page
{
    title: "Connections"
}
Right now it’s just an empty page, we’re going to fill it with life in the next post.
You can find the full source code for all posts on Git.
Happy hacking!
